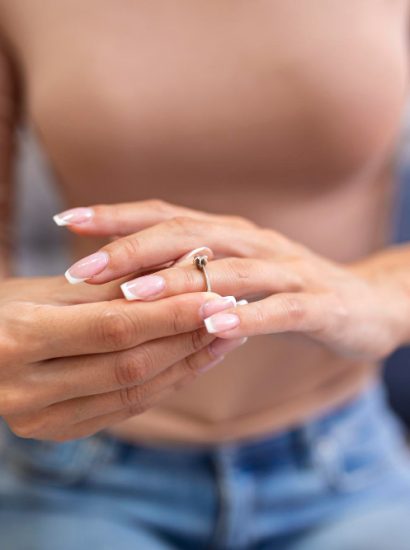
In the world of nail enhancements, trends come and go, but some innovations continue to stand the test of time. One of those is hard gel for nails, a versatile and durable nail enhancement option that has taken salons and at-home nail lovers by storm.
Known for its strength, glossy finish, and natural feel, hard gel has become a favorite for people who want long-lasting, professional-looking nails. Whether you’re a nail technician or a beginner trying to improve your manicures, this guide will walk you through everything you need to know about hard gel for nails—its benefits, application process, and care tips.
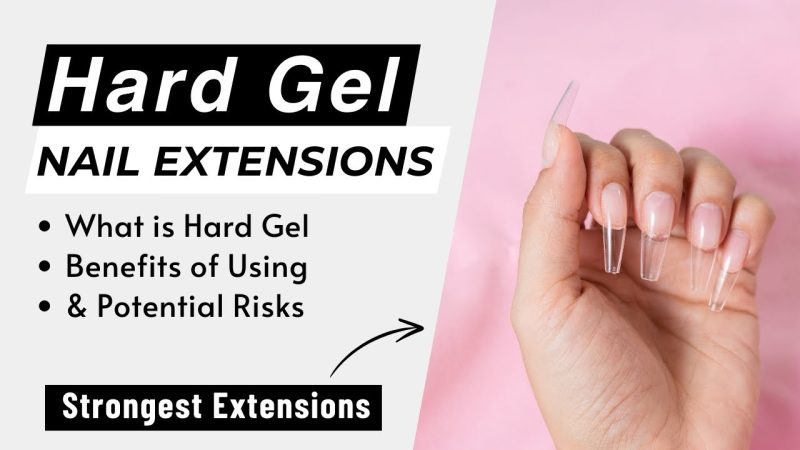
What Is Hard Gel for Nails?
Hard gel for nails is a thick, sculpting gel used to create strong nail extensions or overlays. It’s applied to the natural nail or nail tips and then cured under a UV or LED light to harden.
Unlike gel polish, which is thin and flexible, hard gel forms a durable, protective layer that doesn’t chip easily. It’s often used for building nail length, repairing broken nails, or creating intricate nail designs.
Once cured, hard gel becomes firm, glossy, and resistant to damage—making it ideal for people who want strong, beautiful nails that last.
The Difference Between Hard Gel and Acrylic Nails
Although hard gel for nails and acrylic nails may look similar, they’re very different in texture, feel, and application.
Hard gel is lighter and more flexible than acrylic, which gives it a more natural appearance. It also has a smoother, glass-like shine that doesn’t require excessive buffing. Acrylic nails, on the other hand, are made from a liquid-and-powder mixture that air-dries and often emits a strong odor during application.
Hard gel must be cured under a light, while acrylics harden on their own. Another big difference is removal—hard gel for nails must be filed off, while acrylics can be soaked in acetone.
If you prefer a lightweight, odor-free, and glossy finish, hard gel is the superior choice.
Top Benefits of Hard Gel for Nails
Hard gel has become a go-to option in the beauty world for several good reasons.
Below are the key benefits of using hard gel for nails:
Long-Lasting Strength
Hard gel provides incredible durability, often lasting up to four weeks with proper maintenance. It’s resistant to cracks and chips, making it great for everyday wear.
Natural Feel
Despite its strength, hard gel feels lightweight and flexible, allowing for a comfortable and natural experience.
Beautiful Glossy Finish
The gel cures to a high-shine surface that stays glossy even after several weeks.
Odor-Free Application
Unlike acrylics, hard gel for nails has no strong chemical smell, making it pleasant to use at home or in a salon.
Customizable Designs
It can be used for overlays, extensions, or creative nail art—offering endless design possibilities.
What You Need to Apply Hard Gel for Nails
Before applying hard gel for nails, make sure you have the proper tools and materials ready.
You’ll need:
- Hard gel (builder or sculpting gel)
- UV or LED curing lamp
- Nail file and buffer
- Nail forms or tips
- Base coat and top coat
- Nail cleanser or alcohol
- Cuticle pusher
- Lint-free wipes
- Nail brush
Having the right setup ensures smoother application, a cleaner finish, and longer-lasting nails.
Step-by-Step Guide: How to Apply Hard Gel for Nails
Here’s a simple, step-by-step process to help you achieve salon-quality results at home:
Step 1: Prep Your Nails
Clean your hands, push back the cuticles, and lightly buff the nail surface to remove any oils and shine. Proper prep helps the gel adhere better.
Step 2: Apply Nail Forms or Tips
If you’re extending your nails, secure nail forms or tips to your natural nail.
Step 3: Apply a Base Coat
Brush on a thin layer of base gel and cure it under the UV/LED lamp for 30–60 seconds.
Step 4: Build with Hard Gel
Use a gel brush to apply a small bead of hard gel for nails. Spread it evenly and shape the nail as desired. Cure again under the lamp. You may need two or three layers for the right thickness and structure.
Step 5: File and Shape
Once fully cured, file and shape the nails to smooth any imperfections.
Step 6: Apply Top Coat
Finish with a top coat to lock in shine and seal the gel. Cure once more under the lamp.
Step 7: Cleanse and Finish
Wipe off the sticky residue with a gel cleanser or alcohol. Apply cuticle oil for hydration, and your hard gel nails are ready to go!
How to Safely Remove Hard Gel for Nails
Removing hard gel for nails requires care and patience to avoid damaging your natural nails.
Here’s how to do it safely:
- Use a coarse nail file to gently remove the top layer of the gel.
- Switch to a finer file as you get closer to your natural nail.
- Do not peel or pick the gel—it can cause breakage or thinning.
- Once the gel is removed, apply cuticle oil and a strengthening treatment to restore moisture.
If you’re unsure, consider visiting a professional for safe removal.
Common Mistakes to Avoid
When working with hard gel for nails, a few common mistakes can lead to lifting, cracking, or early chipping.
Avoid these:
- Skipping nail prep or applying gel to oily nails.
- Using thick, uneven layers that don’t cure properly.
- Not curing long enough under the lamp.
- Using cheap or low-quality gel products.
- Neglecting aftercare and moisturizing.
Taking your time and following best practices ensures that your nails stay flawless for weeks.
How to Care for Hard Gel Nails
Proper maintenance helps extend the life and shine of hard gel for nails.
Here are some essential care tips:
- Moisturize daily: Use cuticle oil to prevent dryness.
- Avoid using nails as tools: Don’t open cans or scrape surfaces with them.
- Wear gloves: When cleaning or washing dishes, protect your nails from harsh chemicals.
- Get regular fills: Schedule touch-ups every 2–3 weeks to maintain strength.
- Keep nails dry: Excess moisture can weaken the gel’s adhesion.
With the right care, your nails will stay strong, glossy, and beautiful long after your salon visit or DIY session.
Creative Design Ideas with Hard Gel for Nails
One of the best things about hard gel for nails is its versatility. You can customize your look in countless ways.
Popular styles include:
- French tips: A timeless, elegant look.
- Encapsulated glitter: Adds sparkle under clear gel.
- Marble designs: Swirled colors for a chic, artistic effect.
- Ombre fades: Gradual color blending from light to dark.
- 3D designs: Create floral or geometric shapes directly in the gel.
Hard gel gives you the freedom to experiment with both classic and trendy nail art.
Is Hard Gel for Nails Right for You?
Hard gel for nails is perfect for people who want long-lasting, glossy manicures that don’t easily chip or break.
It’s great for:
- Those with brittle or weak nails needing reinforcement.
- People who love extended or sculpted nail shapes.
- Anyone seeking an odor-free alternative to acrylics.
However, if you prefer something that’s easier to remove at home or less maintenance-intensive, soft gel or gel polish might be a better fit.
Conclusion
Hard gel for nails is more than just a beauty trend—it’s a game-changer for achieving strong, flawless, and customizable manicures. With its natural look, high shine, and lasting durability, it’s no wonder hard gel has become a favorite in both salons and home nail setups.
When applied and cared for correctly, hard gel offers long-lasting protection and beauty without the heaviness of acrylics. Whether you’re looking for a practical everyday solution or a canvas for creative nail art, hard gel for nails provides the strength, style, and flexibility you need.
If you’ve never tried it, now is the perfect time to experience why so many nail enthusiasts swear by hard gel!
FAQs
1. What is hard gel for nails used for?
Hard gel is used to build nail extensions, strengthen natural nails, or create custom nail art designs that last for weeks.
2. How long does hard gel last?
With proper care and maintenance, hard gel for nails can last anywhere from 3 to 4 weeks before needing a refill.
3. Can I apply hard gel at home?
Yes, you can apply hard gel at home if you have the right tools, UV/LED lamp, and practice good technique.
4. Is hard gel safe for natural nails?
Yes, hard gel for nails is safe when applied and removed correctly. Always avoid peeling or prying it off to prevent damage.
5. What’s the best way to remove hard gel?
The safest way to remove hard gel is to file it down gently with a nail file or have it professionally removed by a nail technician.
Also read: Castor Oil as Lube: Benefits, Risks, and Safer Natural Alternatives